Installation Guides

Need help with downloading and installing our presets? Select your Lightroom Version Below
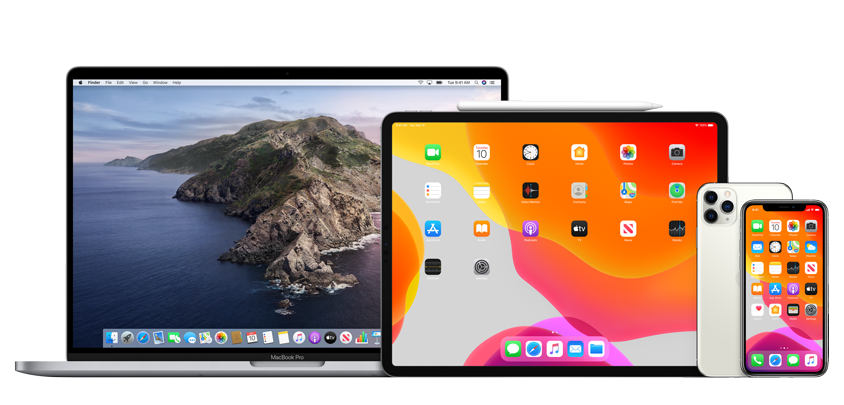
Select your Lightroom Version

Apple iOS

Apple iOS

Our instructions are available in video guides or step by step instructions
Start Tutorial

Android

Android

Our instructions are available in video guides or step by step instructions
Start Tutorial

Lightroom CC Desktop Mac/Win

Lightroom CC Desktop Mac/Win

Our instructions are available in video guides or step by step instructions
Start Tutorial
Lightroom Classic Desktop Mac/Win

Lightroom Classic Desktop Mac/Win

Our instructions are available in video guides or step by step instructions
Start Tutorial
Photoshop Desktop Mac/Win

Photoshop Desktop Mac/Win

Our instructions are available in video guides or step by step instructions
Start Tutorial
Select your viewing preference

Select your viewing preference

Select your viewing preference

Select your viewing preference

Select your viewing preference

Step 1

Launch the Photos App

Open the “Photos” app on your iPhone to open your gallery

Step 1

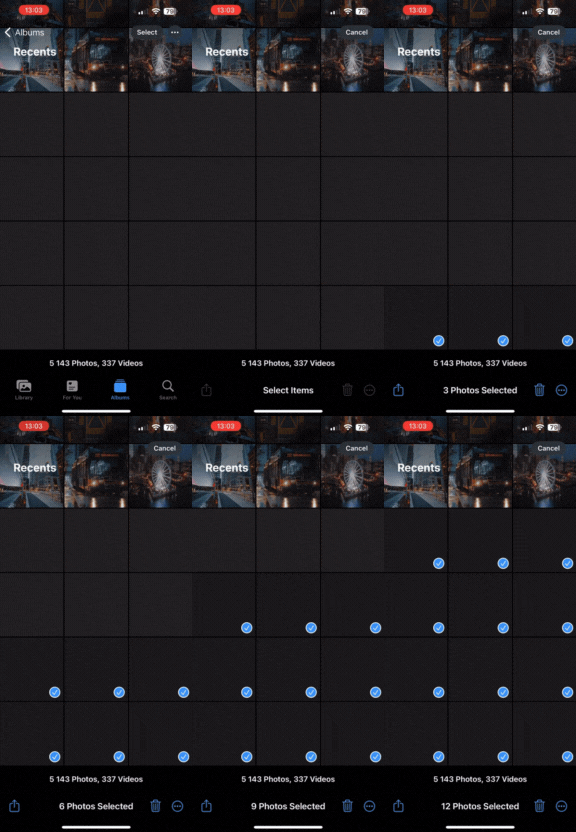
Find and select the DNG Files

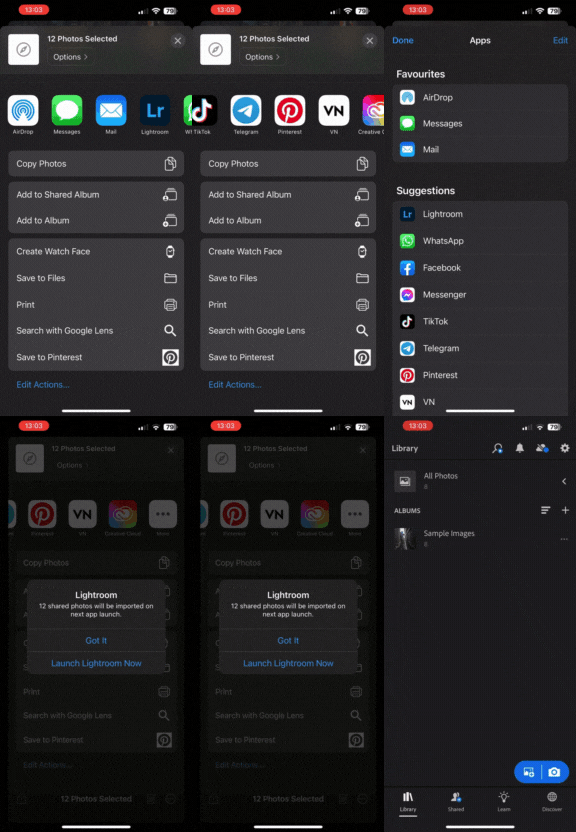
In your gallery, select the newly downloaded Presets. The files might appear blank. Do not worry, this is normal
Step 3

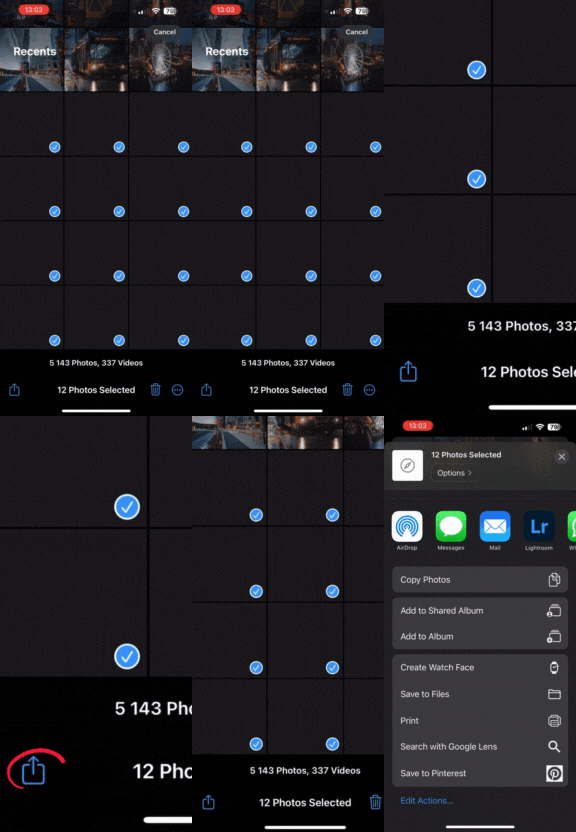
Click the Share Button

Depending on your version of iOS, the share icon could be found at the bottom of the screen. Tap on that

Step 4

Share to the Lightroom App

Share to the Lightroom App. if you do not see the App, scroll all the way and select more to find it. In the popup, select “Launch Lightroom Now”
Step 5

Select DNG Files in Lightroom

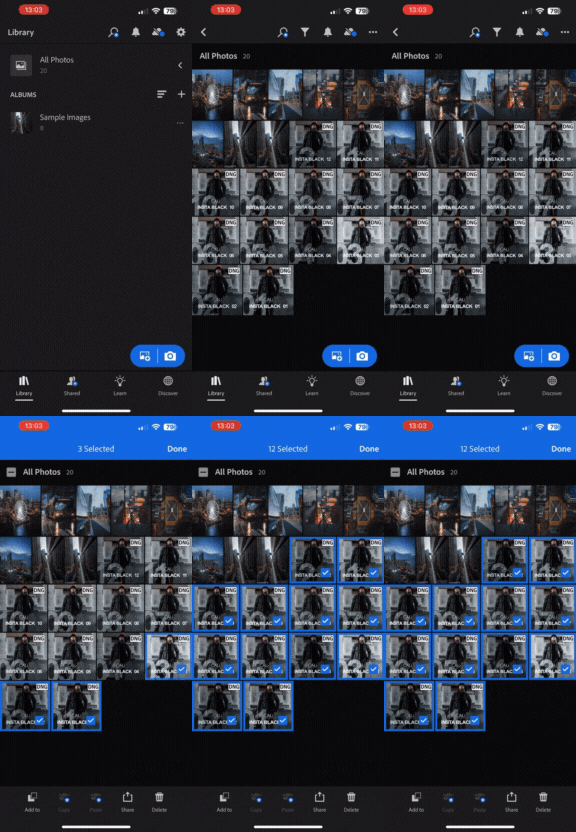
Find the newly added DNG files in Lightroom under all photos, and select them

Step 6

Add the DNG's to a New Album

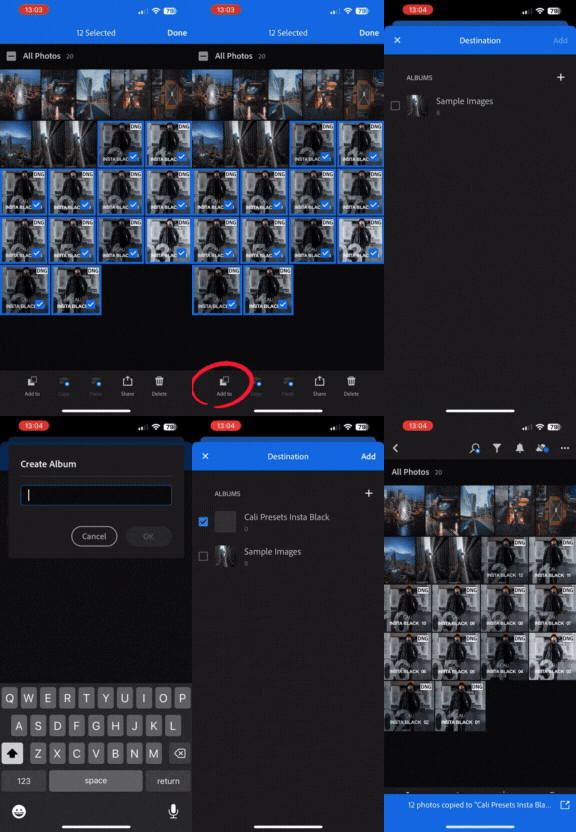
Select “Add to” at the bottom of the screen, select and create a new album. Name it according to the Presets, for example “Cali Presets Insta Black”

Step 7

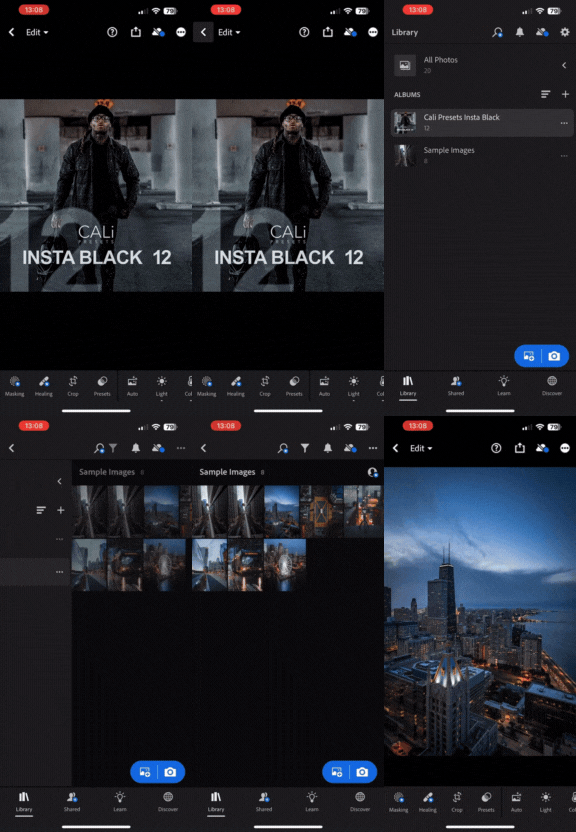
Find the DNG's under new album

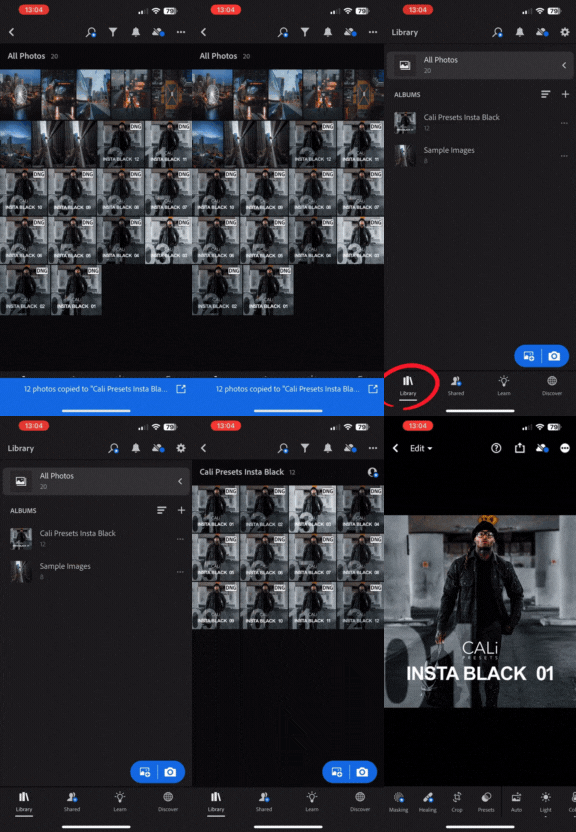
Navigate back to the Library, and find the DNG files under the new album you created, and open the First DNG file

Step 8

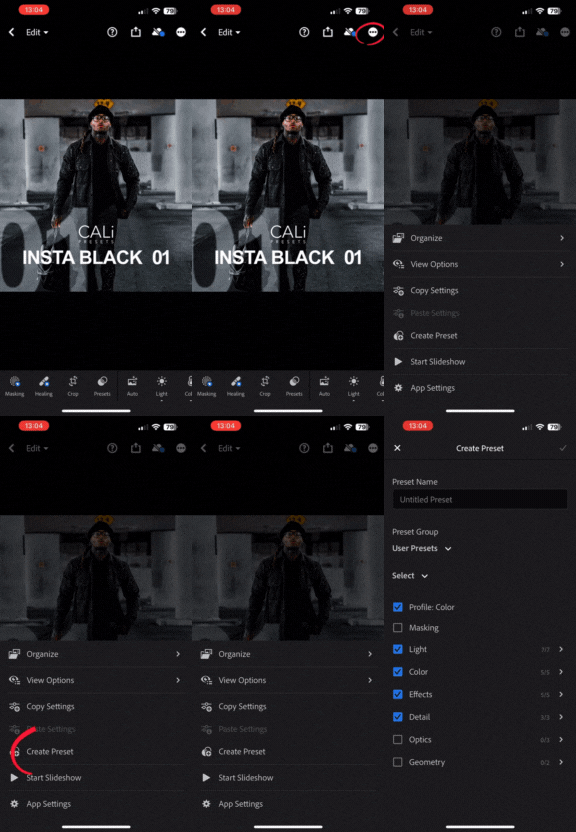
Tap the 3 Dots, and select "Create Preset"

With the first DNG open, tap the three dots on top, and select “Create Preset”

Step 9

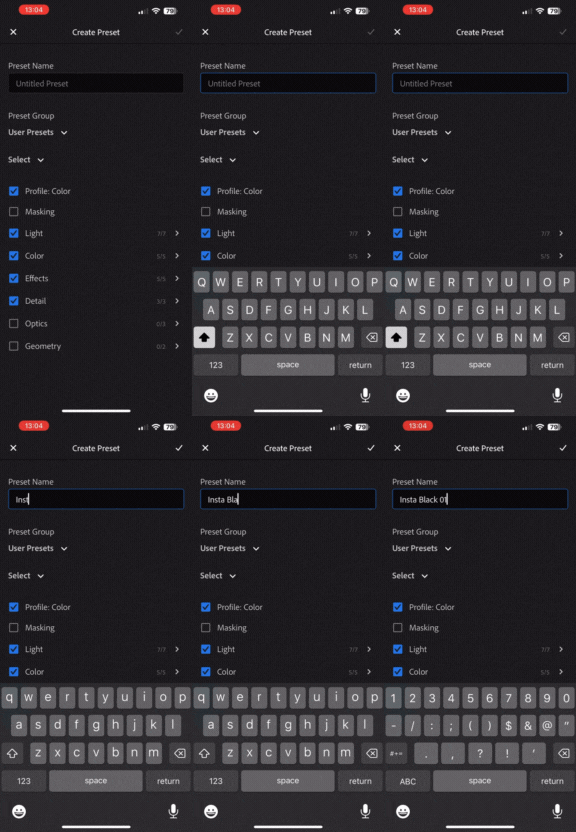
Name the Preset

Enter the exact same name as on the DNG image. In this case, it is Insta black 01. This will help you find them later

Step 10

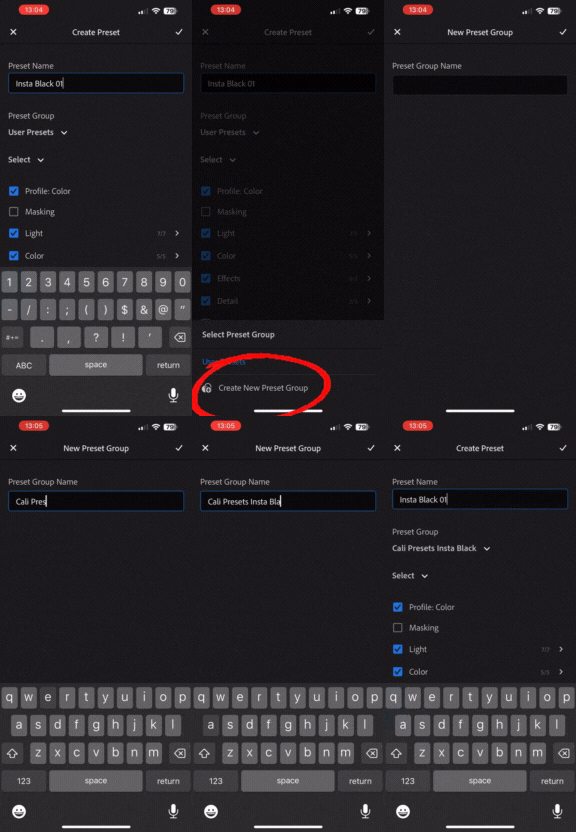
Create and name a New Preset Group

In the same window, tap on the Preset Group drop down and select “Create New Preset Group”. Name it Cali Presets Followed by the name of the Collection

Step 11

Tap "Select" Dropdown and select all

Still within the same window, tap the “Select” Dropdown and tap Select All. Now hit the Checkmark to finish creating the preset

Step 12

Repeat These Steps

Repeat these steps until all the presets have been saved

Step 13

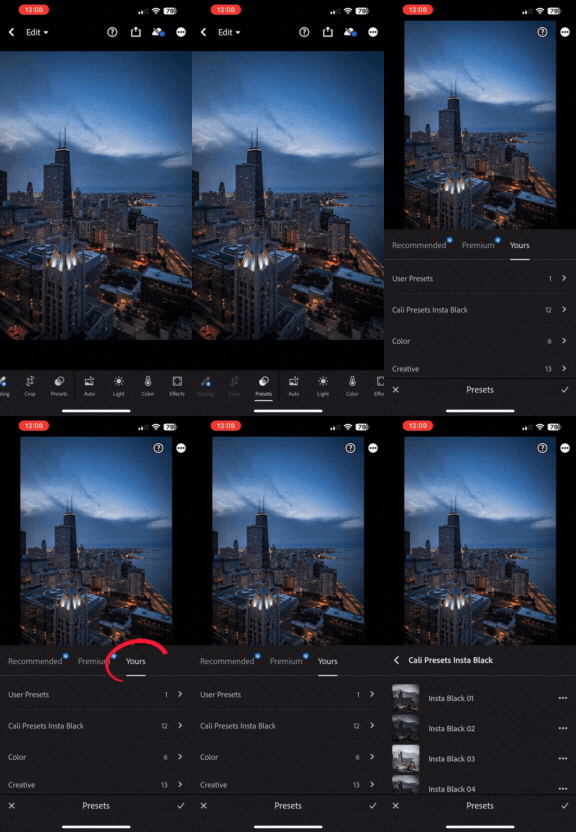
Open an image to edit

Go back to the Library to find an image you wish to apply an preset to

Step 14

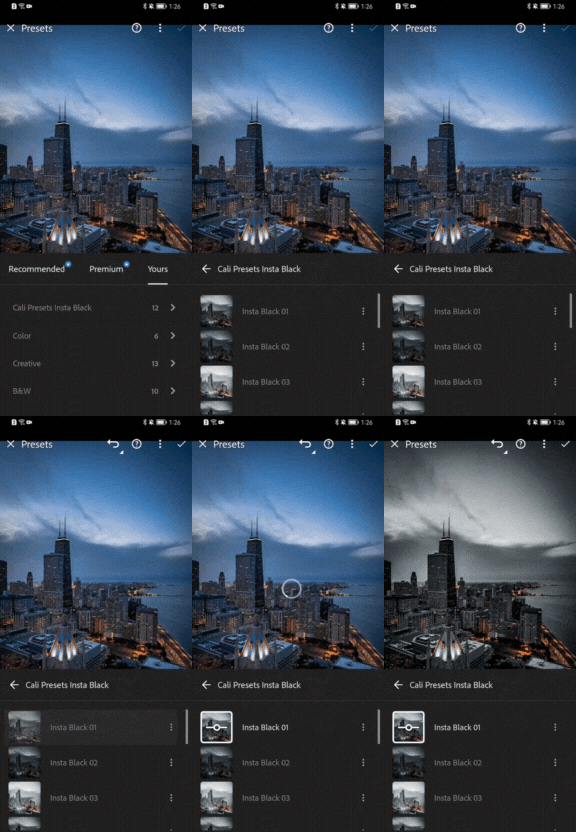
Tap on the "Presets" Icon

At the bottom of your Lightroom screen, navigate to and tap on the “Presets” icon.  Make sure the “Your” option is selected

Step 15

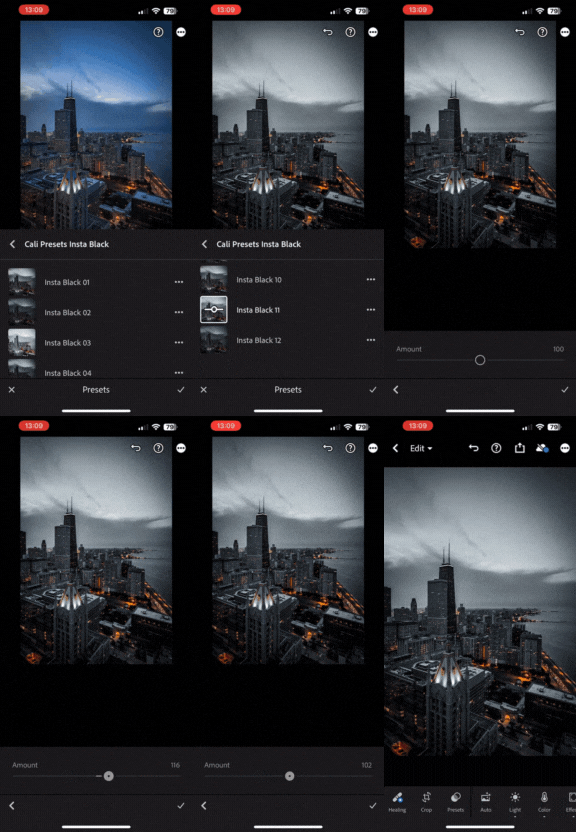
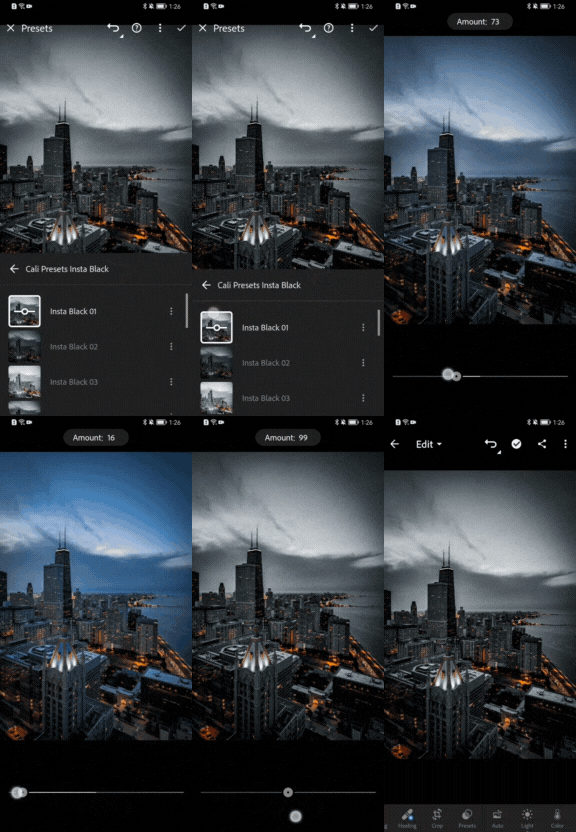
Adjust the intensity

We have successfully installed and located the Presets. Now you can adjust them by tapping on the horizontal Line icon next to the preset name, and adjust the intensity to your liking

Step 1

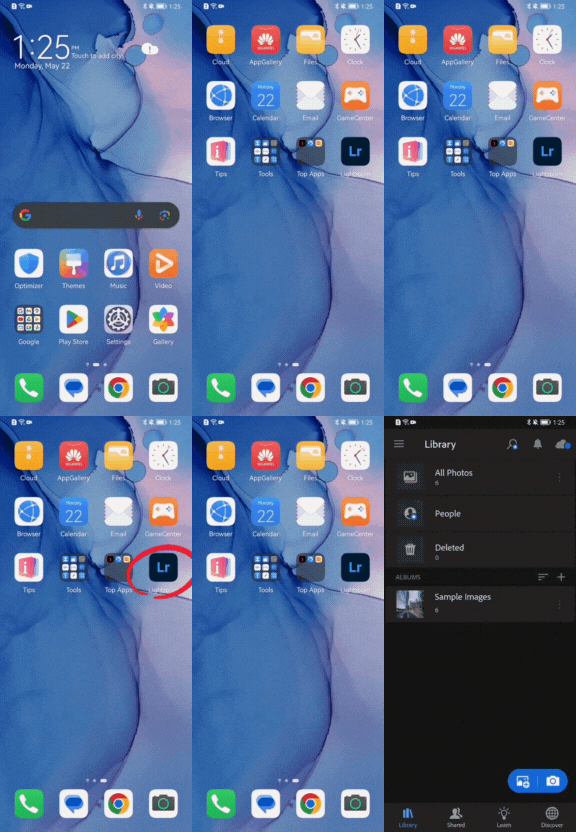
Open the Lightroom App

Find and open the Lightroom App on your phone. If you do not yet have it, you can easily download it from the app store

Step 2

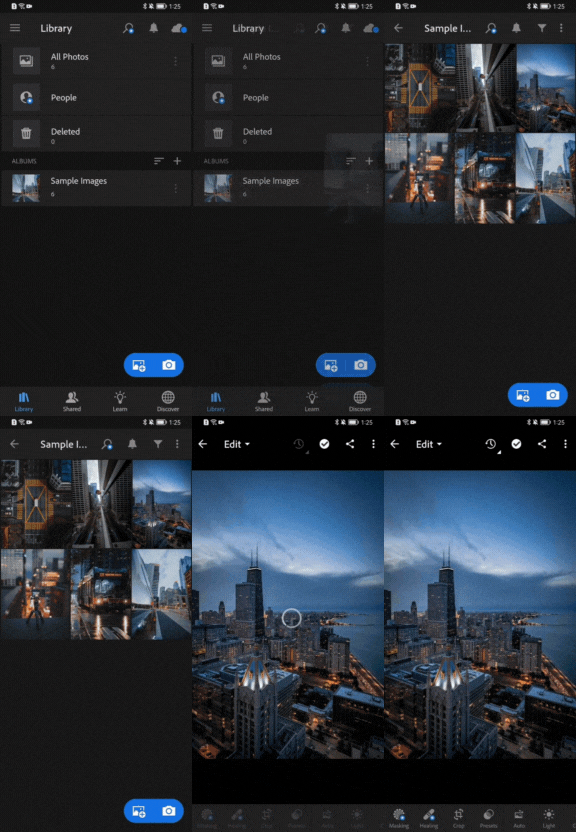
Select an image

Before we can import the presets, we will first need to open an image. If you do not yet have any images in Lightroom, you will need to import atleast one to proceed

Step 3

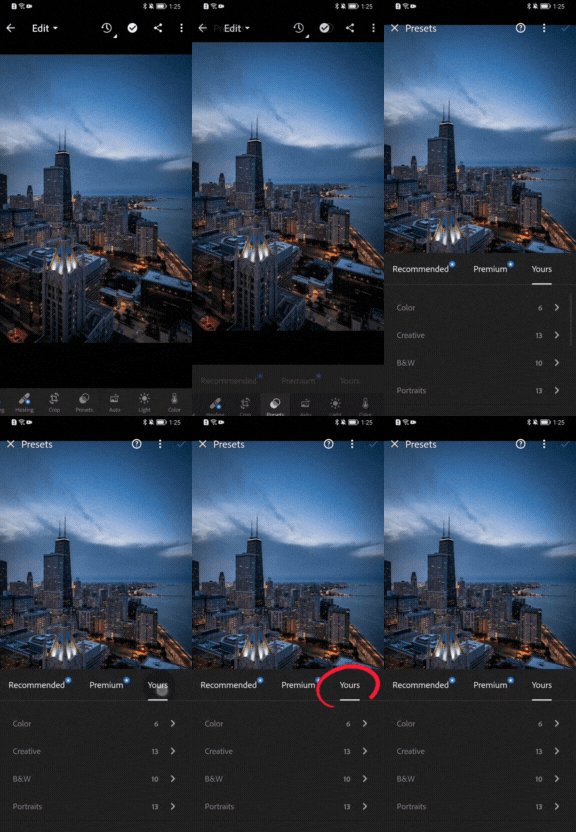
Select the "Presets" icon

In the Edit panel at the bottom of your screen, you will need to find the “Presets” icon. Tap on it, and make sure the “Yours” option is selected

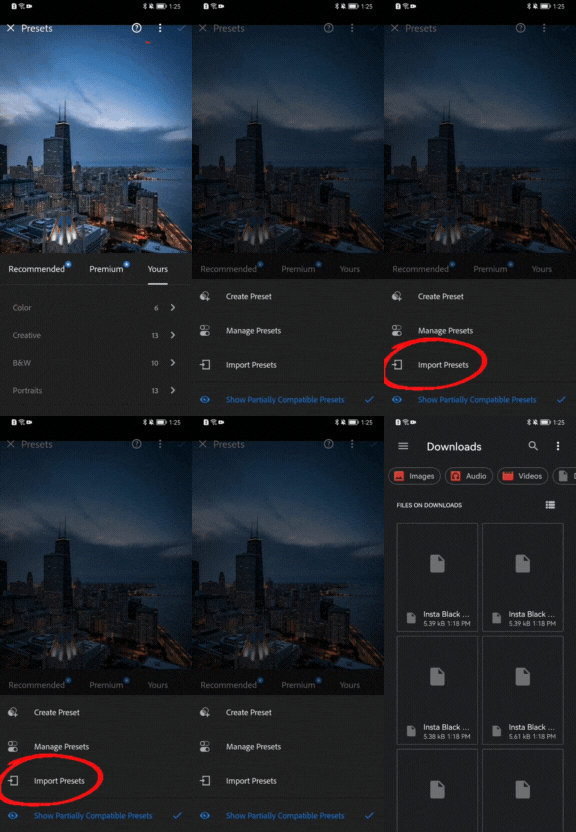
Step 4

Select the "Presets" icon

With the Preset panel open, tap the 3 dots on the top right hand corner, and select “Import Presets”

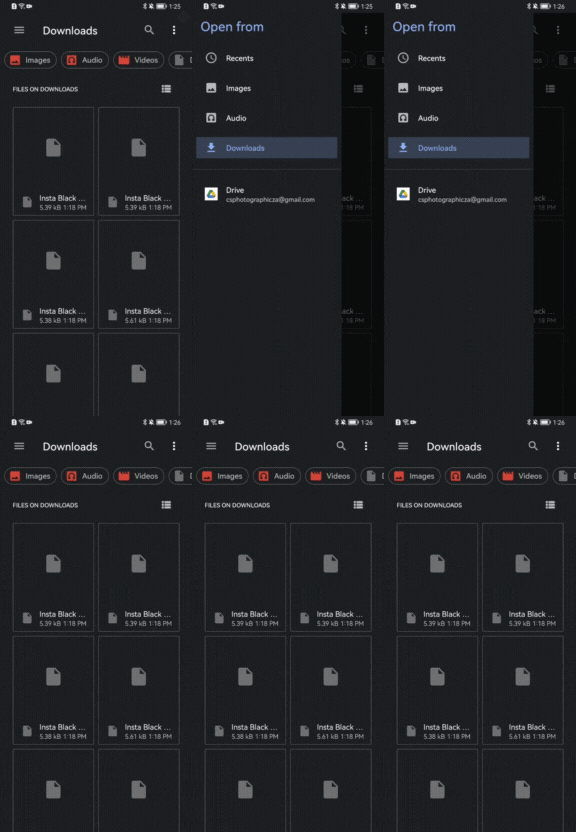
Step 5

Locate the downloaded Presets

Locate the downloaded presets in your phones download folder

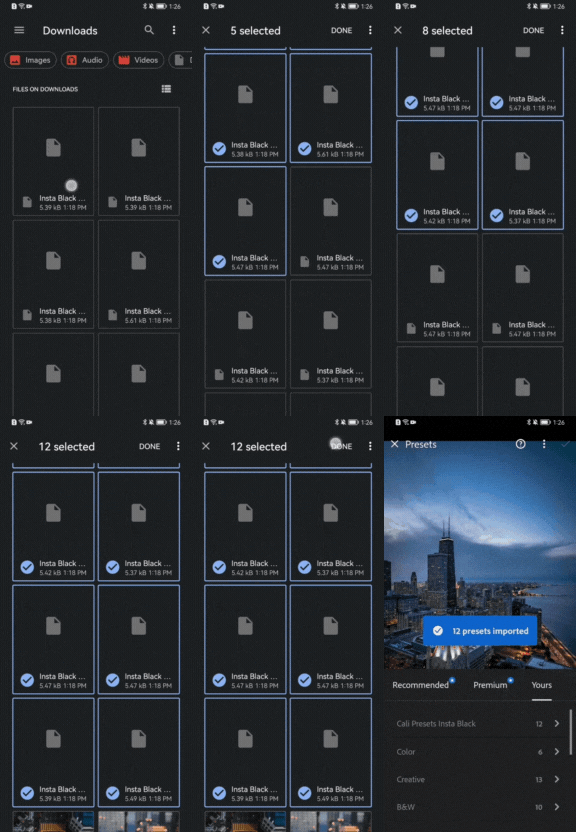
Step 6

Tap to select the Presets

Tap to select the presets you wish to import, and tap “Done” at the top right hand corner

Step 7

Apply the Preset

Your Presets have successfully been imported. you can now proceed to apply them by opening the newly imported preset group, and tapping on the desired preset

Step 8

Adjust the intensity

In newer versions of Lightroom, you can now adjust the intensity of the preset. Tap on the horizontal line icon next to the preset, and slide to adjust the intensity. Tap the Checkmark to apply

Step 1

Launch the Lightroom App

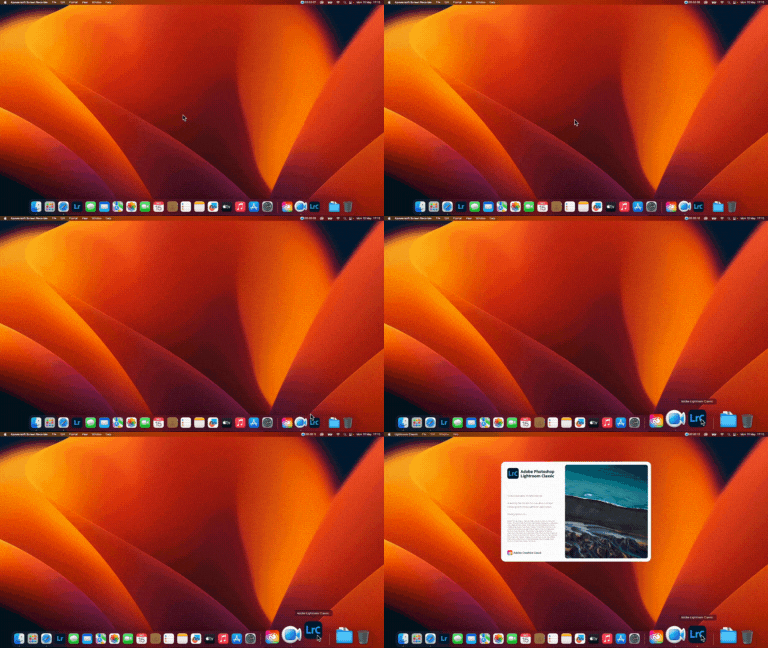
Locate where the app is installed on your operating system, and open Lightroom

Step 2

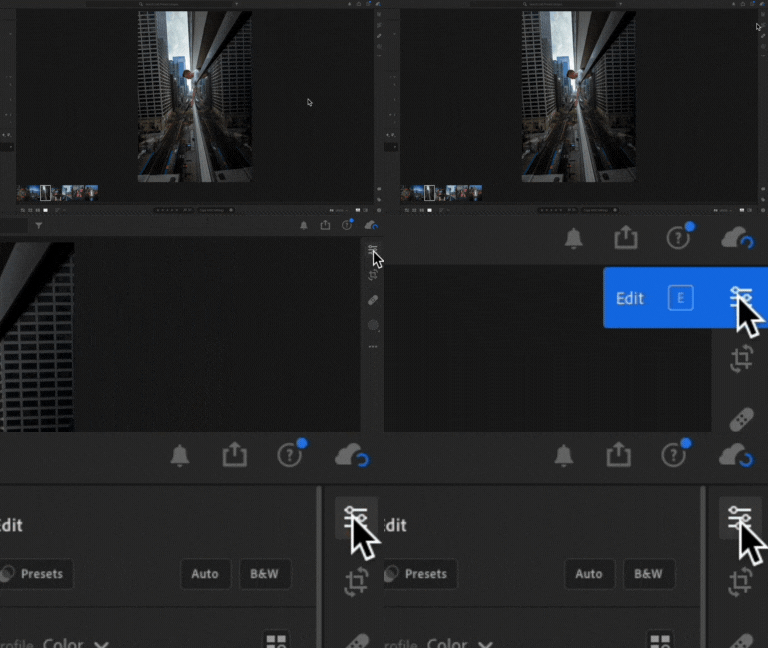
Select the Edit Panel

Depending on your version of Lightroom CC, the appearance might be slightly different. But the same princible applies. You will need to locate the Edit panel and click on that.

Step 3

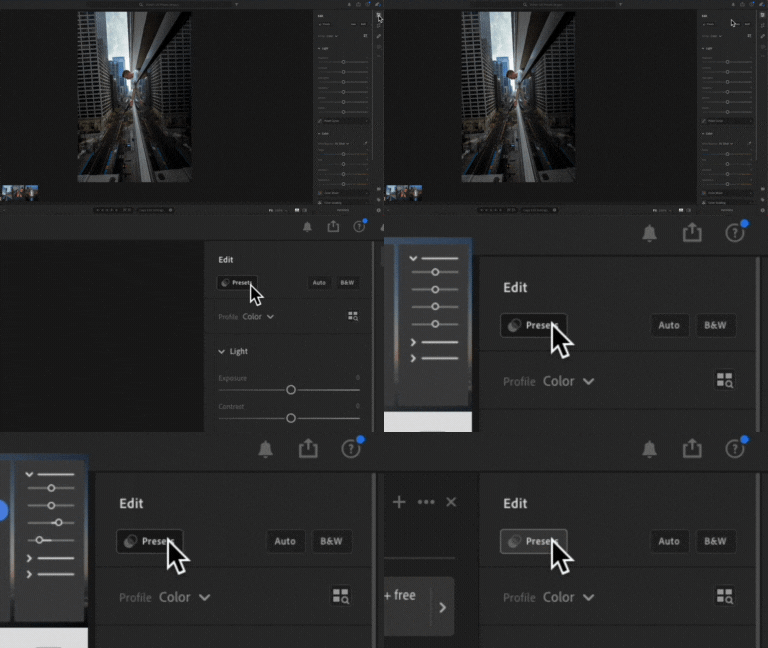
Navigate to the Presets Module

Once you are in the “Edit” Module, navigate to the “Presets” panel. On older versions of Lightroom CC, the “Presets” panel might be at the bottom of the “Edit” module and not to the top right like in the sample above.

Step 4

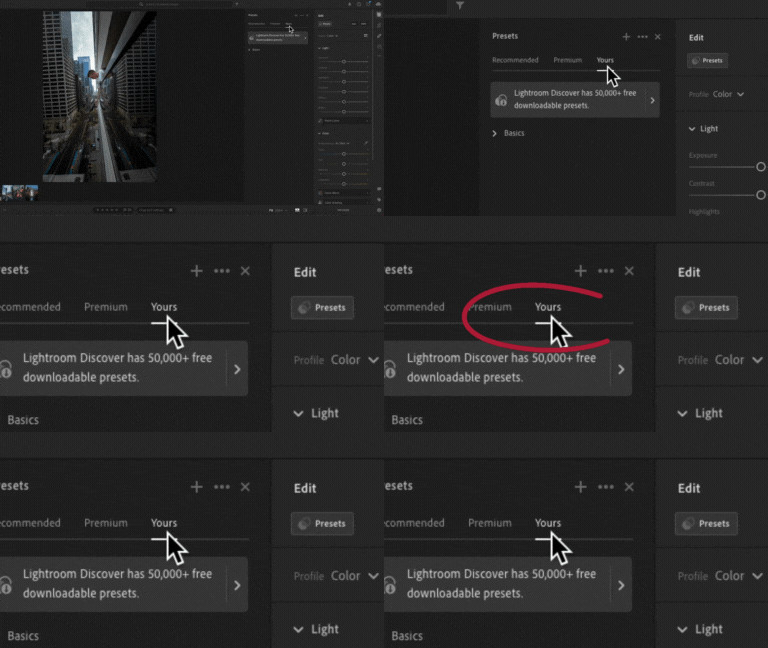
Select "Yours" Collection

Make sure the “Yours” Preset Collection is selected. *Note that on older versions of Lightroom CC this option might not be available. So you can just proceed to the next step.

Step 5

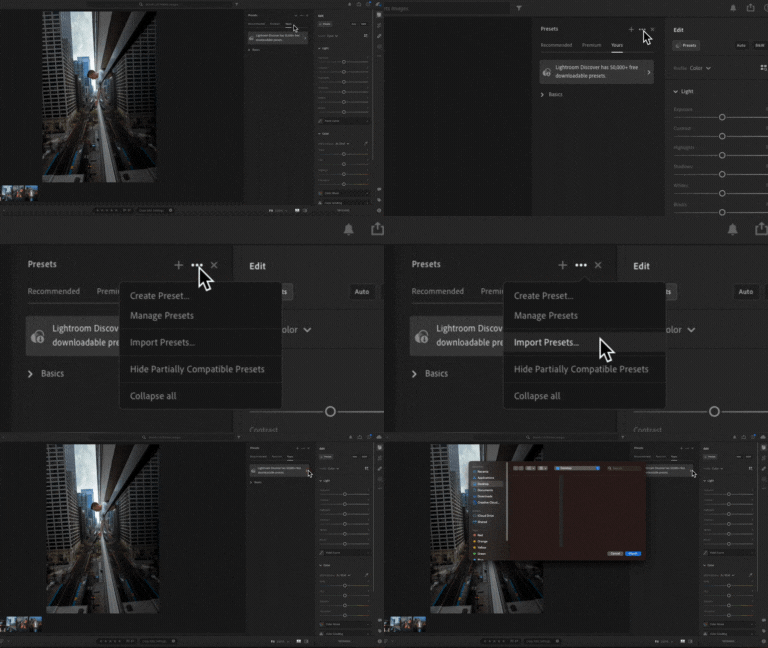
Select the 3 dots to open a dropdown menu and select "Import Presets"

Find the three dots which should be on the top right hand side within the presets panel, and select import presets. 

Step 6

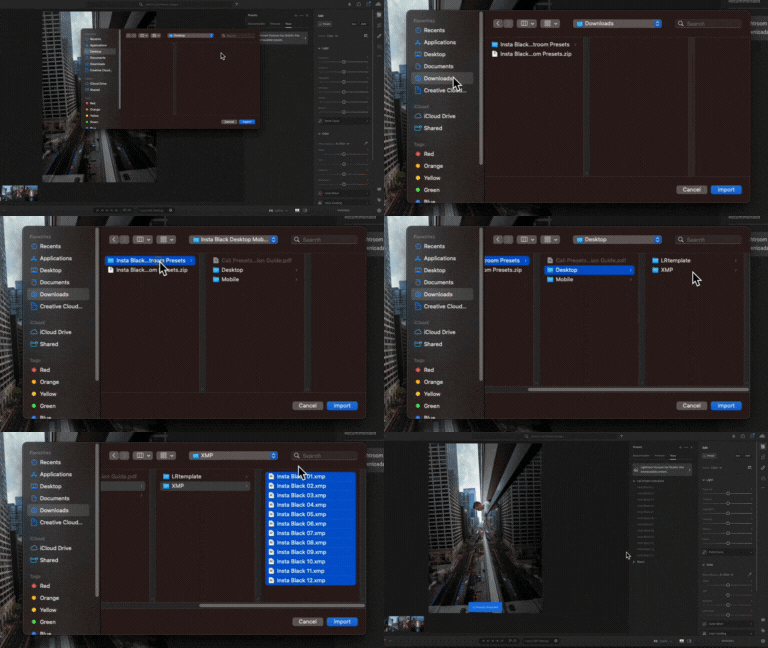
Locate your Downloaded Presets and click "Import"

The Finder window should open. Locate the presets you have downloaded and need to import. For this version of lightroom we will need to import the XMP files. 

Step 1

Open Lightroom Classic CC

Locte and launch the Lightroom Classic CC app from your Desktop Device

Step 2

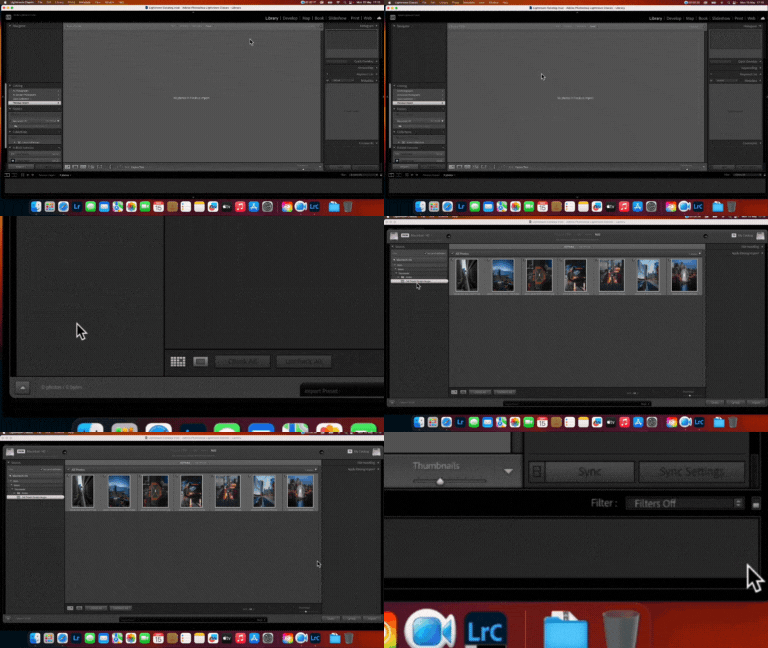
Locate and Import Images

Before installing presets in Lightroom Classic, you will first need to import some images in order to view the installed presets. Go to the Library module, and import some photos

Step 3

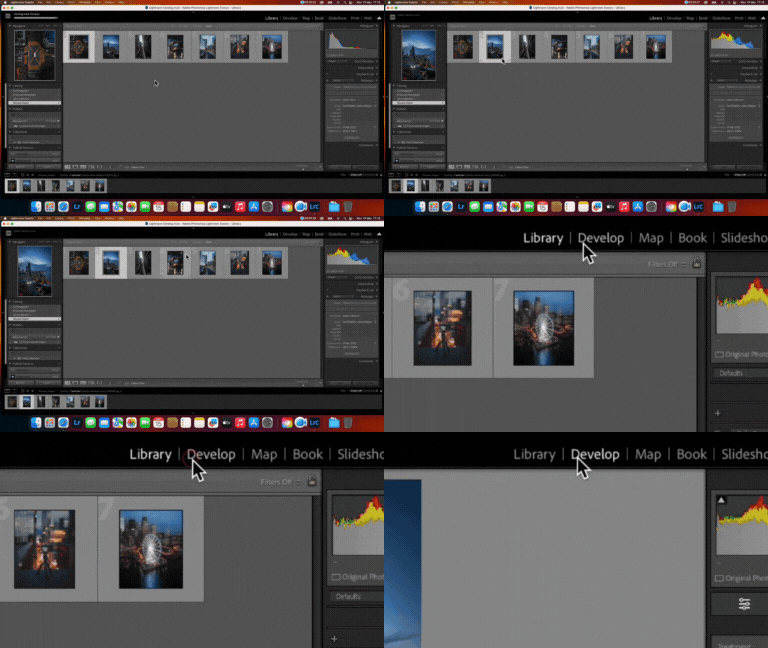
Navigate to the Develop Module

After importing some photos into Lightroom, proceed to select an image and go to the develop Module

Step 4

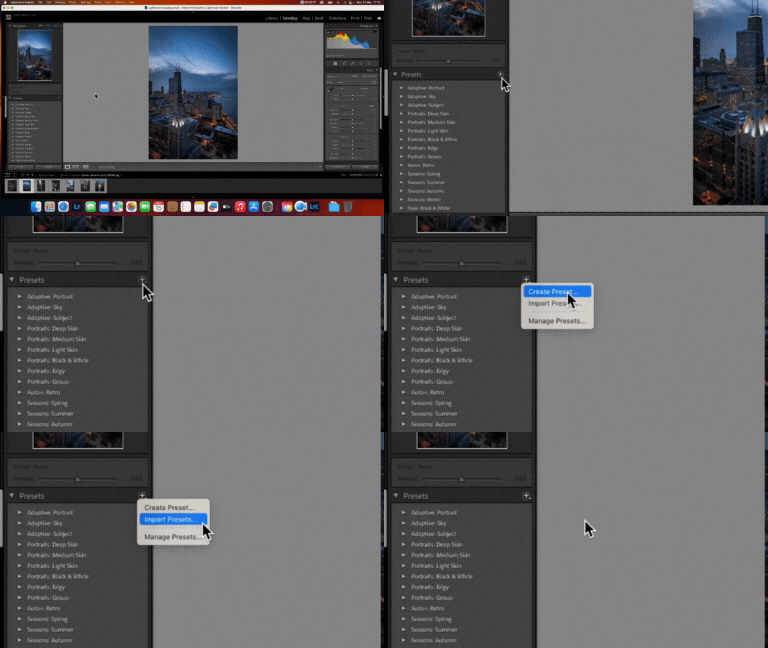
Click on the "+" Icon and select "Import Presets"

Find the “+” Icon (Usually on the left hand side) nd select “Import Presets”. This will open the finder window

Step 4

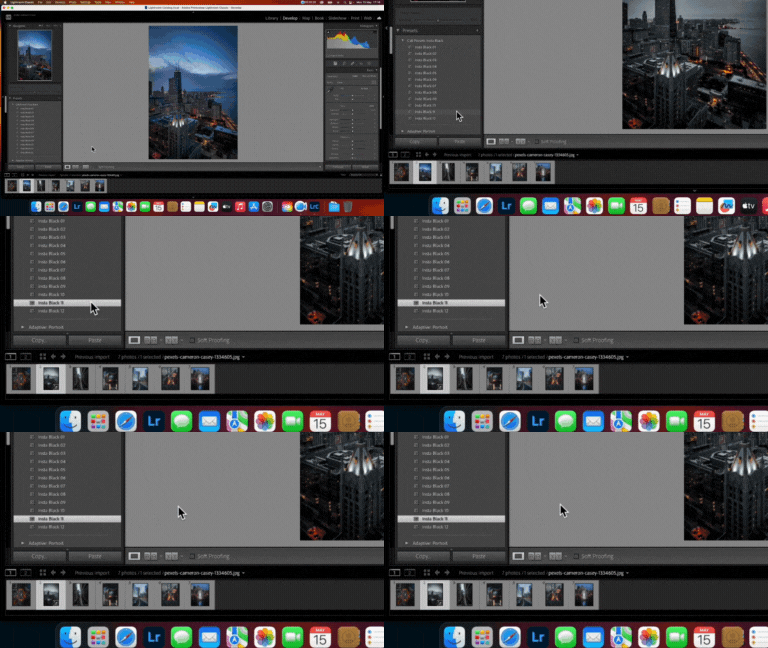
Locate Preset Files and Import them

Find where the newly downloaded presets are saved, and select the XMP files (Lrtemplate if its an older version of Lightroom CC). Click Import.

Step 6

Your presets are successfully imported

You can now proceed an apply the presets and adjust them according to your liking.

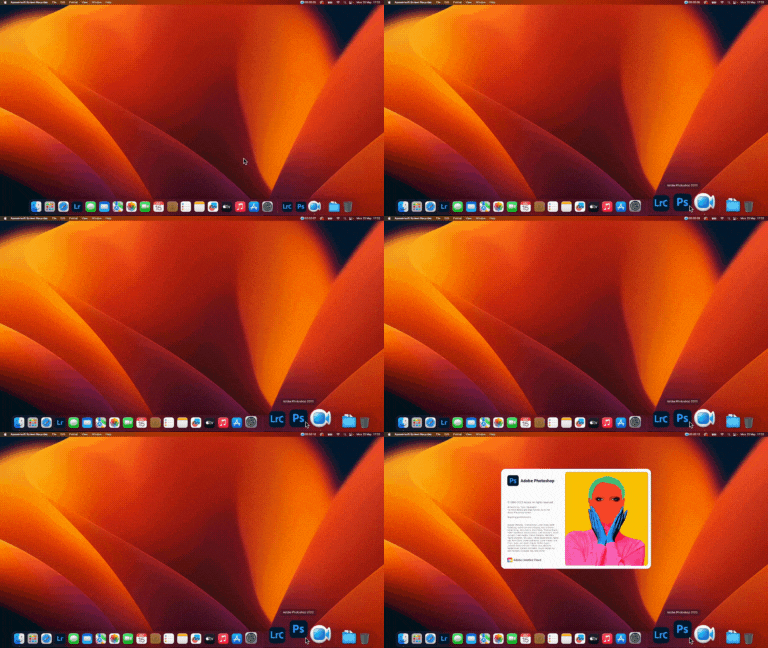
Step 1

Launch Photoshop CC

Locate and launch Photoshop CC from your Desktop. make sure you have the latest version of PS installed before proceeding

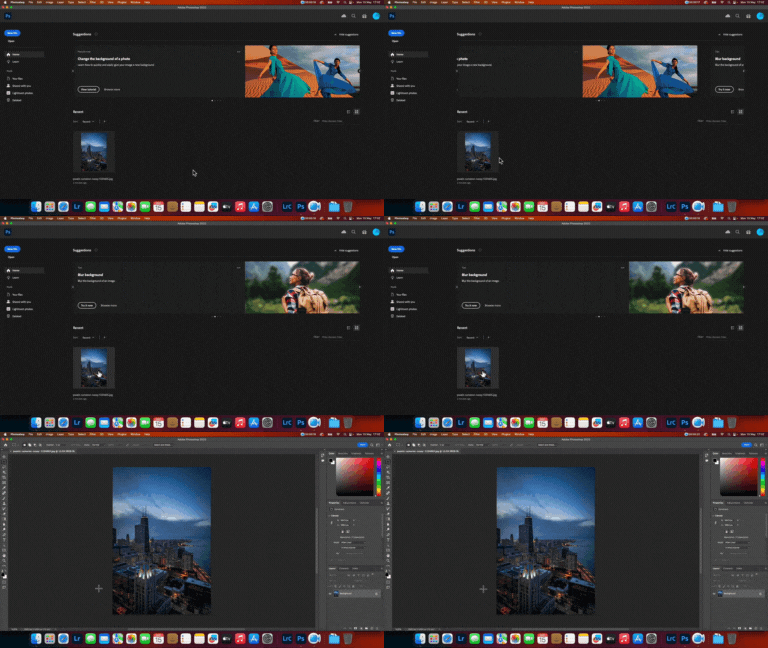
Step 2

Import an Image into Photoshop CC

In order to import and use presets in photoshop, you will first need to import an image. select the desired image.

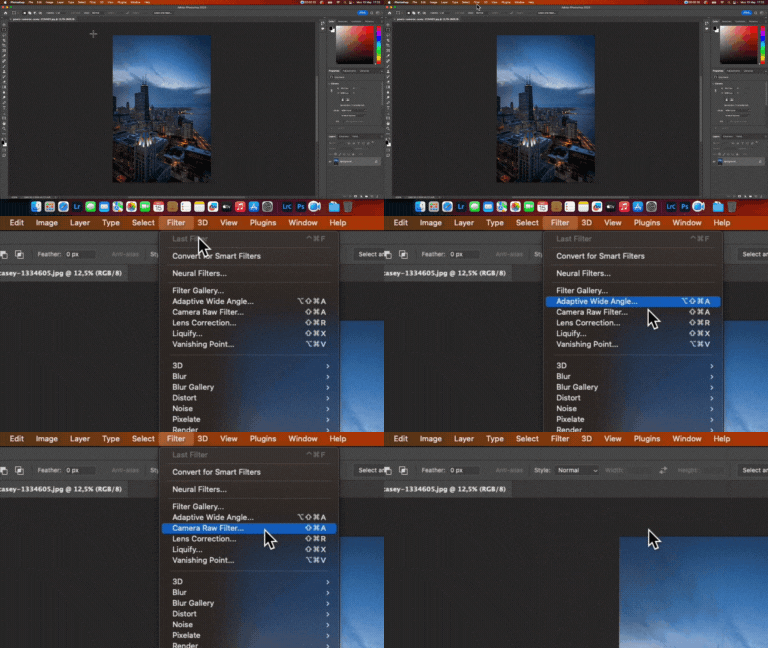
Step 3

Select Filter, and Camera Raw Filter

Next we want to head on over to the “Filter” option in the menu bar, and select “Camera Raw Filter”. This wil open Adobe Camera Raw

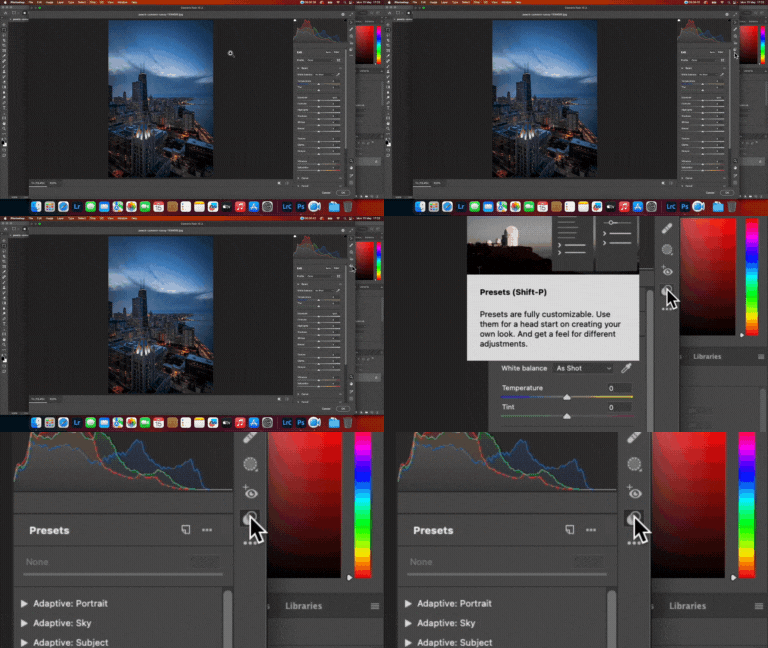
Step 4

Select the "Presets" Panel

Find and select the presets Panel. This panel is available in all the latest version of Photoshop CC. 

Step 5

Select the 3 dots in the Preset Panel

Once the preset panel slides open, click on the 3 dots, and sleect “Import Profiles and Presets”

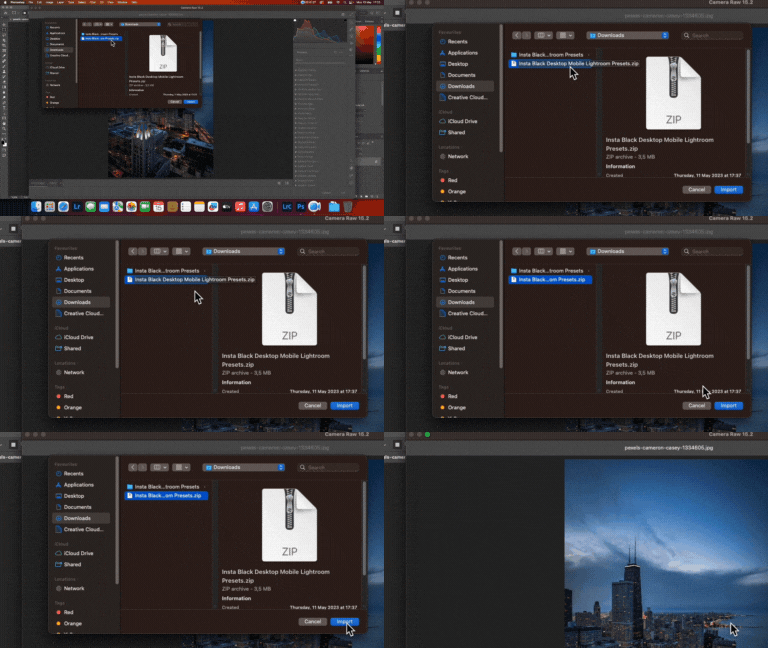
Step 6

Select the Zipped Presets Folder

Locate where your presets has been downloaded or saved too, and click import. *Note, the presets will need to be zipped in order to be imported into Photoshop

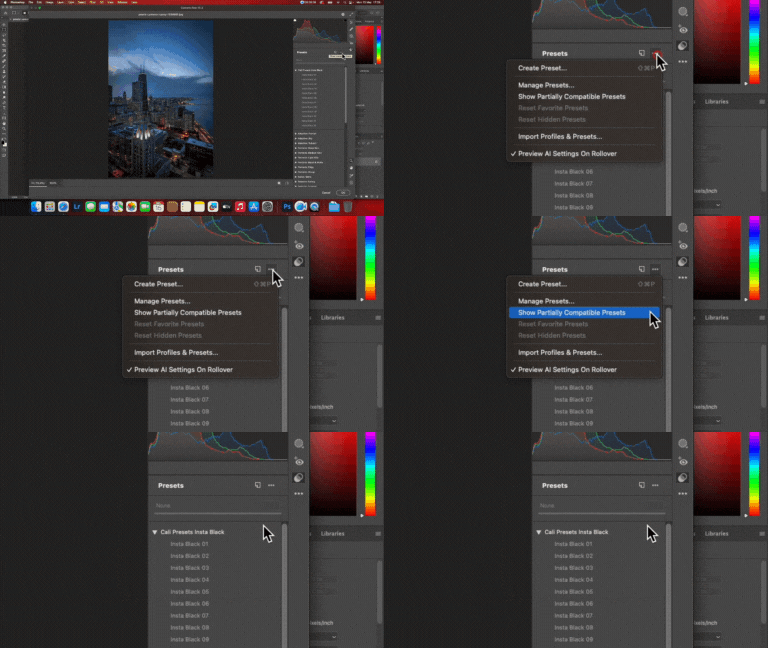
Step 7

If you do not see the presets

If you do not see the presets after you have imported them, we will need to change a setting. Head back to the three dots in the preset panel, and select “Show Partially compatible Presets”

Step 8

You have successfully imported your presets

You can proceed and apply the presets and make adjustments according to your liking